
⚠️ Who is this article for? This guide is for Entity Admins who need to create roles that go beyond EngageRocket's default options. If you are not yet familiar with how permissions and roles work, start with the Overview of the Permissions Section first.
EngageRocket allows you to create custom user roles with exactly the permissions you choose. This is useful when the default roles do not match the access requirements of certain team members — for example, an HR Business Partner who needs to view the employee list but should not be able to manage surveys.
💡 Before you begin: Custom roles always start with zero permissions enabled. Once you create a role, you will need to manually select every permission you want to grant. Nothing is turned on by default.
Step 1: Creating a New Custom Role
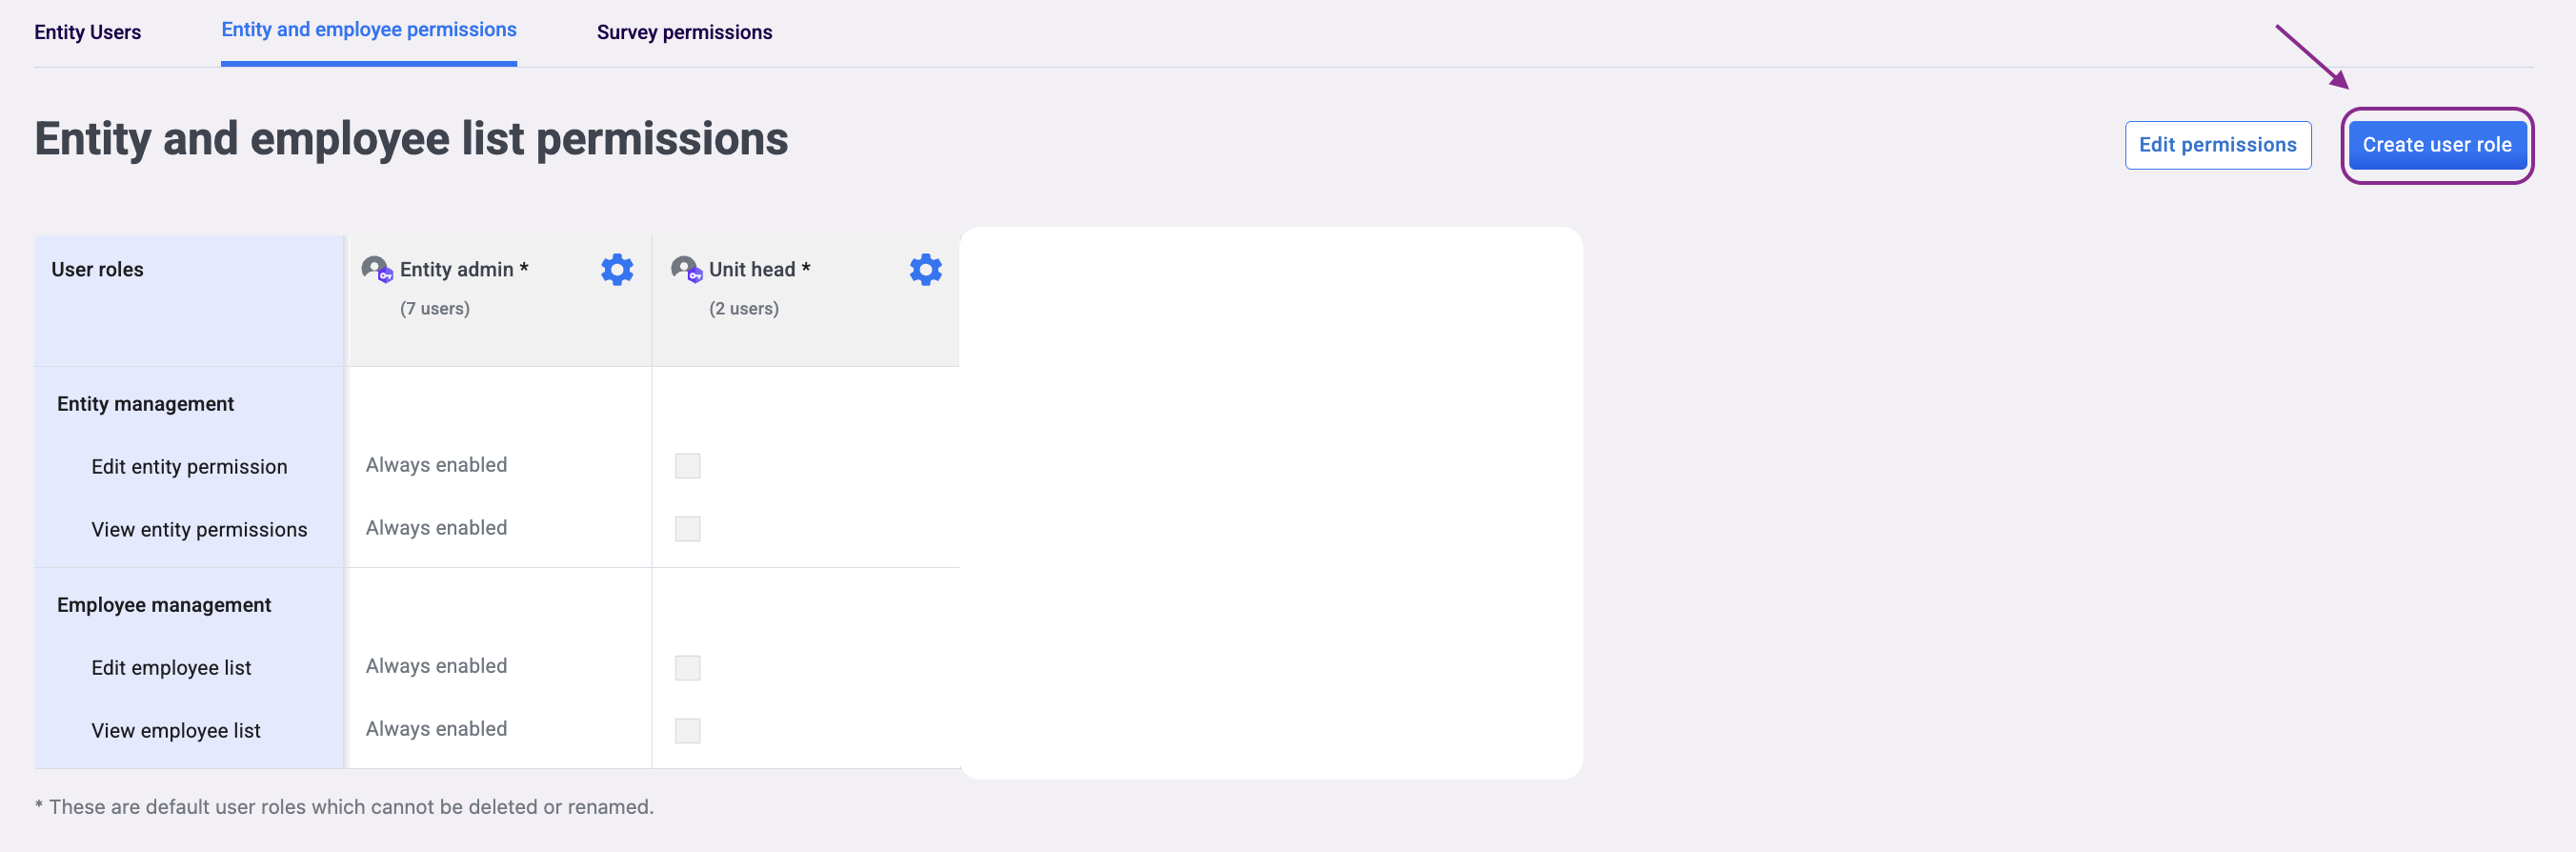
- Navigate to Entity Permissions from the top navigation bar.
- Click on the 'Entity & Employee Permissions' tab.
- Click 'Create new role'.
-
Enter a unique name for the new role — up to 60 characters. Choose a name that clearly describes its purpose, such as 'HR Viewer' or 'Survey Manager'. This name will appear in the role assignment list, so make it easy to recognise.
- Click 'Create user role'. The role is created with no permissions enabled.
- Find the new role in the permissions list and click 'Edit Permission'.
- Tick the checkboxes for the specific permissions you want to grant to this role.
- Click 'Save Changes'. The permissions are applied immediately to all users currently assigned this role.
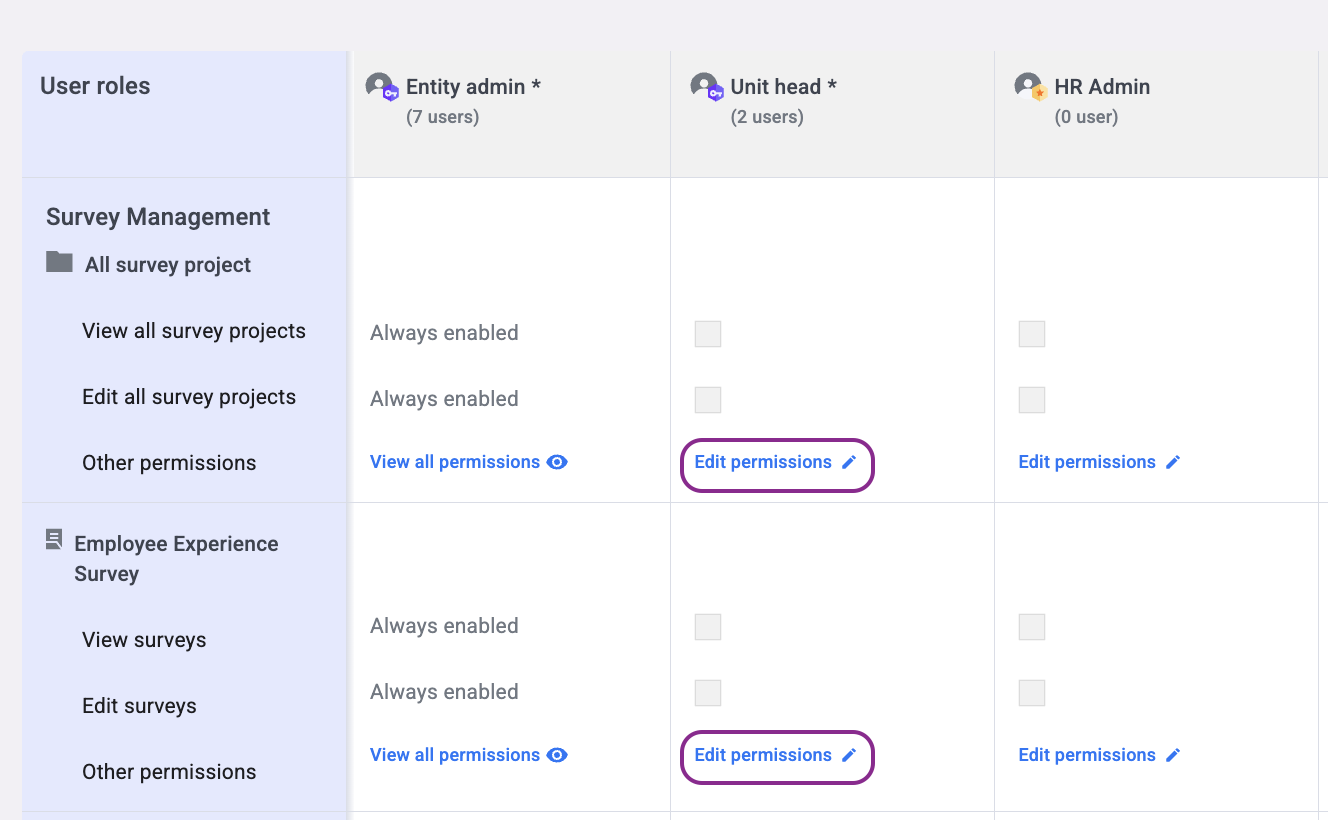
💡 Not sure which permissions to assign? See the Entity & Employee Permission Settings guide and the Survey and Dashboard Permissions guide for a full breakdown of what each permission does.
Step 2: Assigning the Custom Role to a User
- Go to the Entity Users tab.
- Find the user you want to assign the role to and select the checkbox next to their name.
- Click 'Re-assign user roles'.
- Select the custom role you created and click 'Re-assign User Role'. The change takes effect immediately.
💡 Need to invite a new user first? See how to invite and manage Entity Admin users.
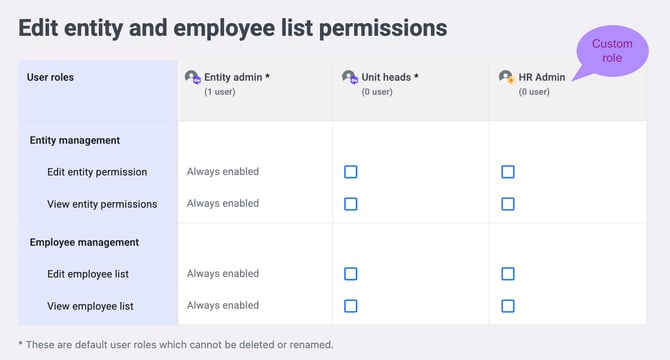
Updating Permissions for an Existing Role
If you need to change what a role can access, go to the Entity & Employee Permissions tab, find the role, and click 'Edit Permission'. Update the checkboxes and click 'Save Changes'. The updated permissions apply immediately to every user currently assigned that role.
⚠️ Important: Updating a role's permissions affects all users assigned to that role at once. If you need to give one specific user different access, create a separate role for them rather than editing the shared role.
Something Not Working?
A user with my custom role cannot see a feature I expected them to access.
- Likely cause: Custom roles start with no permissions — the specific permission for that feature may not have been enabled.
- Action: Go to the Entity & Employee Permissions tab, find the role, click 'Edit Permission', and check that the relevant permission checkbox is ticked.
I need to rename a role.
- Likely cause: Role names cannot be edited after creation.
- Action: First re-assign any users currently on that role to a different role, then delete the incorrectly named role, and create a new one with the correct name.
I updated a role's permissions but one user's access did not change.
- Likely cause: The user has been assigned multiple roles, and another role they hold grants a conflicting or higher permission level.
- Action: Go to the Entity Users tab, find the user, and review all roles assigned to them. Remove or adjust any role that is granting unintended access.
I deleted a role by mistake.
- Likely cause: Role was deleted before users were re-assigned.
- Action: Re-create the role with the same permissions and re-assign the affected users. Contact support@engagerocket.co if you need help identifying which users were affected.
Still Need Help?
If you are having trouble creating or configuring custom roles, reach out to us at support@engagerocket.co and we'll be happy to assist!