Populating and Updating the Employee List
Getting the foundations right.
Before populating your employee list for the first time, we strongly recommend to complete setting up your attributes if you haven’t done so!
To access the Employee list page, simply click on “Employees” > “Employee list” at the top navigation bar of your EngageRocket account. On this page, you will be able to complete the following actions for your employee database:
-
Upload employee data
-
Update existing employee data
-
Send account login invites to administrators or managers
Uploading Employee Data
Upload in Bulk
If you’re launching a survey for the first time on the platform, we encourage you to begin with this straightforward method!

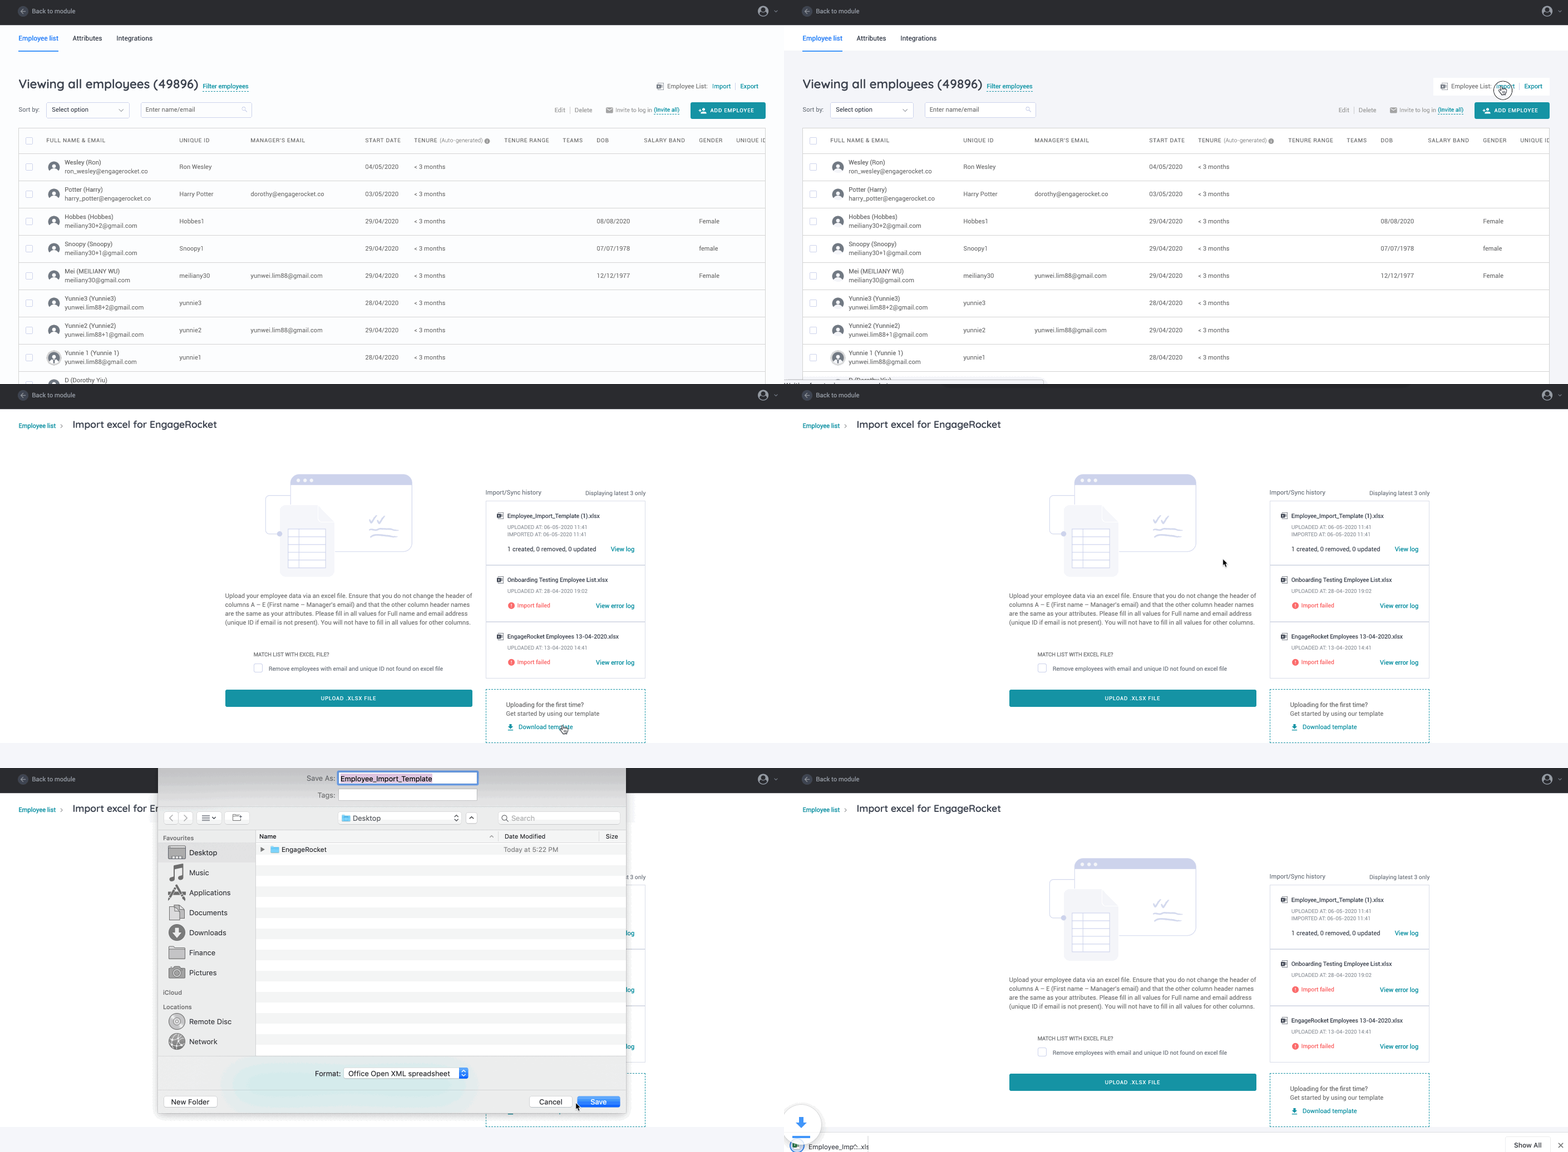
On the Employee list page, click on “Import” and proceed to the “Download template” button on the bottom-right corner of the page to retrieve the Employee Import Template excel file.
The Employee Import Template excel file is where you will input the employee data according to the attributes that were set prior. You will notice that the column headers in the template are in the same order as the attributes set in the previous step.
To ensure that the excel dataset pairs well with the application database at the Import stage, do not change the column header names or add/remove columns in the excel template.
Now, time to punch in the data!

Pro Tip: Populate the Start Date (tenure) column in YYYY-MM-DD format and our system will automatically convert them into Tenure Ranges for you.
For BELONG users: You may leverage our Onboarding Track by launching timely surveys to your new employees based on their hire date.
Once you’re ready with the file, hit the upload button! Should there be any import error, our smart system will flag out the issues for you to work on. Otherwise, do refer to our article Possible Errors while Uploading your Employee List to help with troubleshooting.
Upload Individually
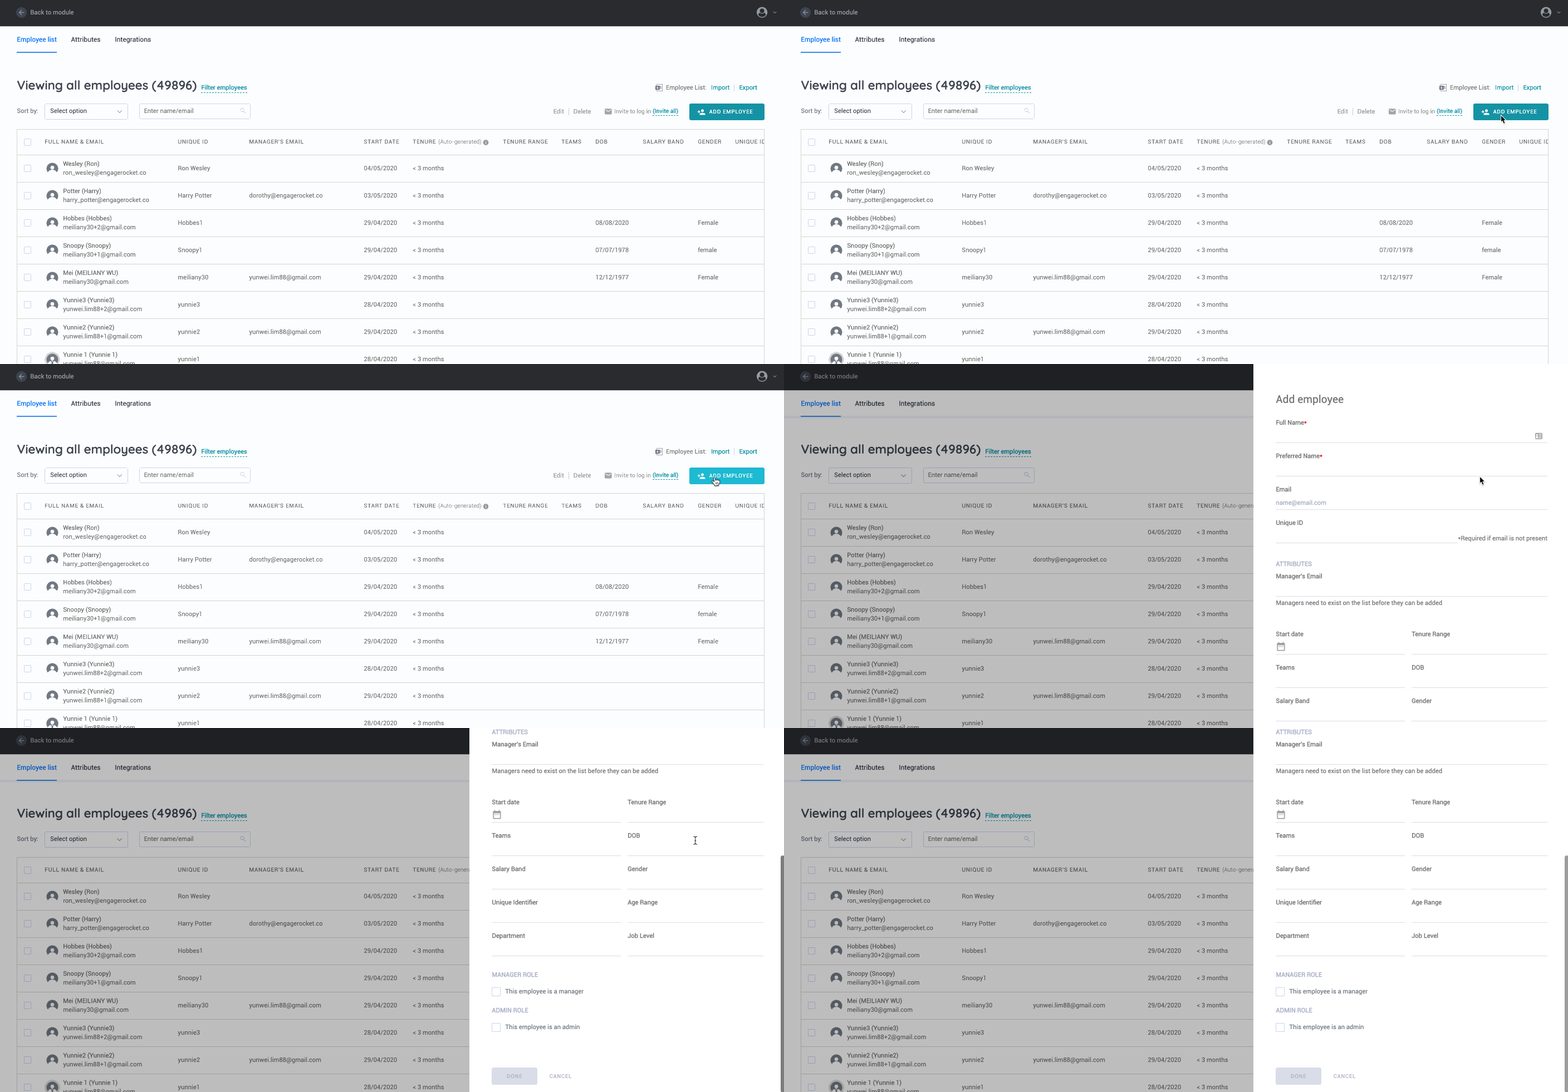
To add employees individually, simply hit the “Add Employee” button and pop in the data. If you have existing employee information in the database, the attribute field will have a drop-down selection for you to select while populating the data.
Updating Employee Data
Once in a while, you'll need to update your employee list due to organic changes within your organisation.

To do so, you can either add, delete or edit an employee one-by-one by checking a name under the Employee list page. Alternatively, you may export the current list, update it and re-upload the file into the system.
EngageRocket recognizes employees via their email address and/or unique identifier. You may make changes to any attribute for the employees while keeping their email address and/or unique identifier unchanged. Likewise, you may check “Remove employees with email and unique ID not found on excel” in the Import page to mass remove any employees that have resigned from the company.
Note: Rest assured that removing employees does not affect old data that were collected. If he/she is a manager, the manager account will no longer be accessible.
For users on BELONG
Sending login invites to other Company Admins and/or Managers
When you are ready to invite other Company Admins or managers to log into their EngageRocket accounts, click the “Invite all” button on the Employee list page. By doing so, email invitations will be sent to the assigned individuals with their login information. If you wish to send the invitations individually, please select the users and then click “Invite to log in”.
What’s the difference between Employee list and Recipient list?
The Employee list acts as a database hosting all your employee data. When there are changes to employee information, this is the go-to to make the necessary edits.
On the other hand, the Recipient list allows you to select employees from the database to partake in specific surveys. You may read more about using the Recipient List here.
For any questions, send an email to our responsive support team at support@engagerocket.co We're here to assist you every step of the way!