
⚠️ Who is this article for? This guide is for Entity Admins responsible for setting up EngageRocket for their organisation. You must complete this step before uploading your Employee List.
Your organisational chart defines the unit hierarchy of your organisation in EngageRocket. Units must exist in the system before employees can be assigned to them, which is why this step comes first.
💡 Before you begin: The org chart must be uploaded before the Employee List. If you attempt to upload employees before setting up your units, the upload will fail.
Uploading Your Organisational Chart
- Log in to EngageRocket and click on the 'Employees' tab in the top navigation bar.
- On the left-hand panel, click 'Organisational Chart'.
- Click 'Bulk Actions', then select 'Import Units' from the dropdown menu.

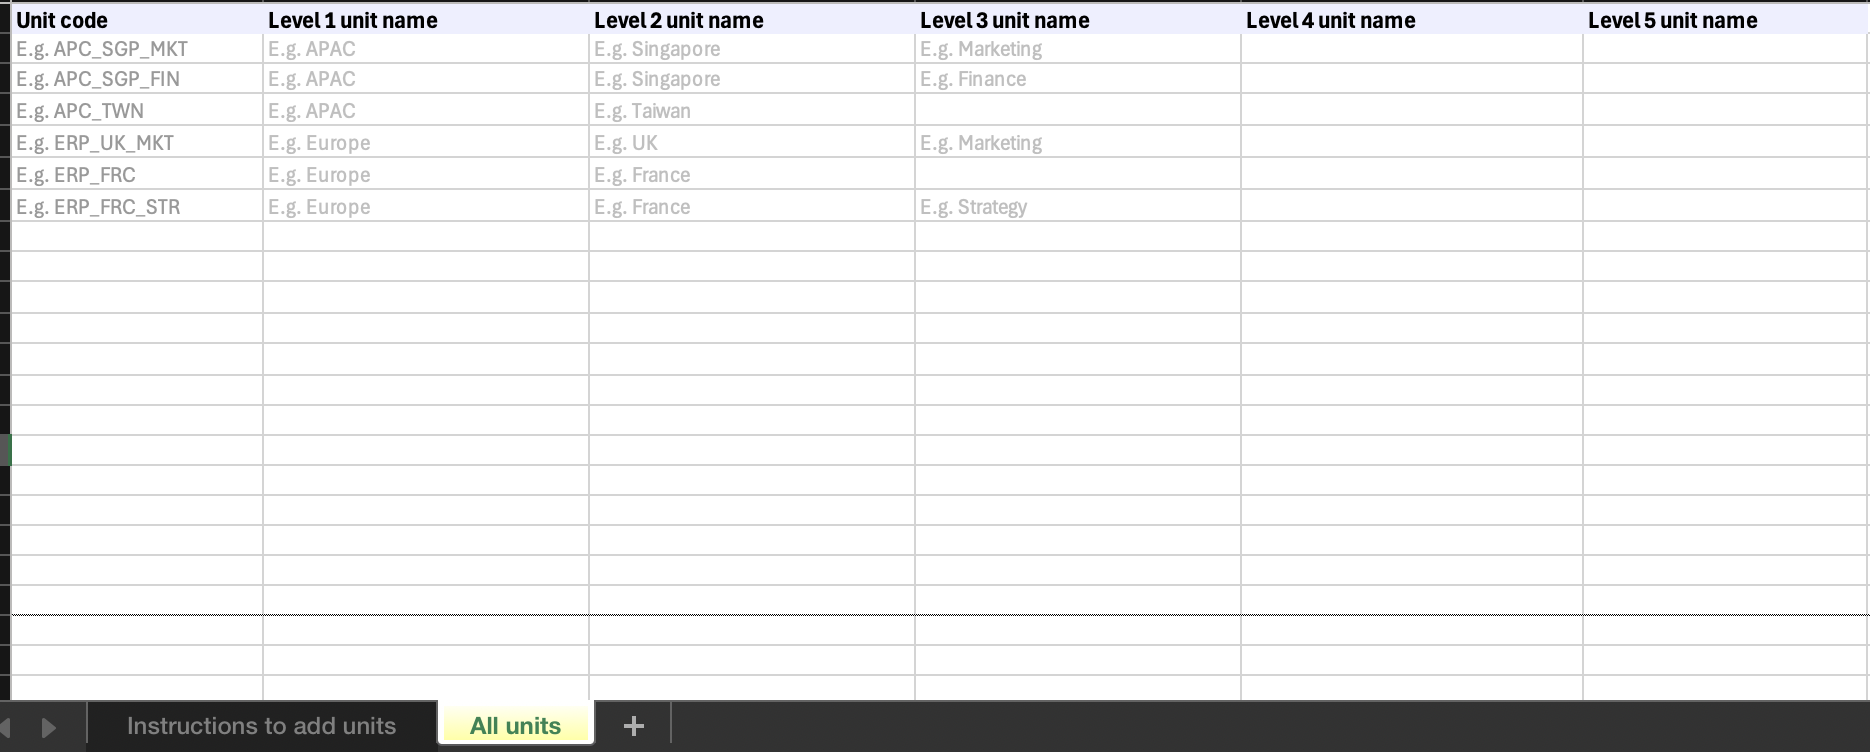
- Click 'Download Template' to get a blank copy of the import file. If you already have a pre-populated template from a previous setup, you can skip this step.
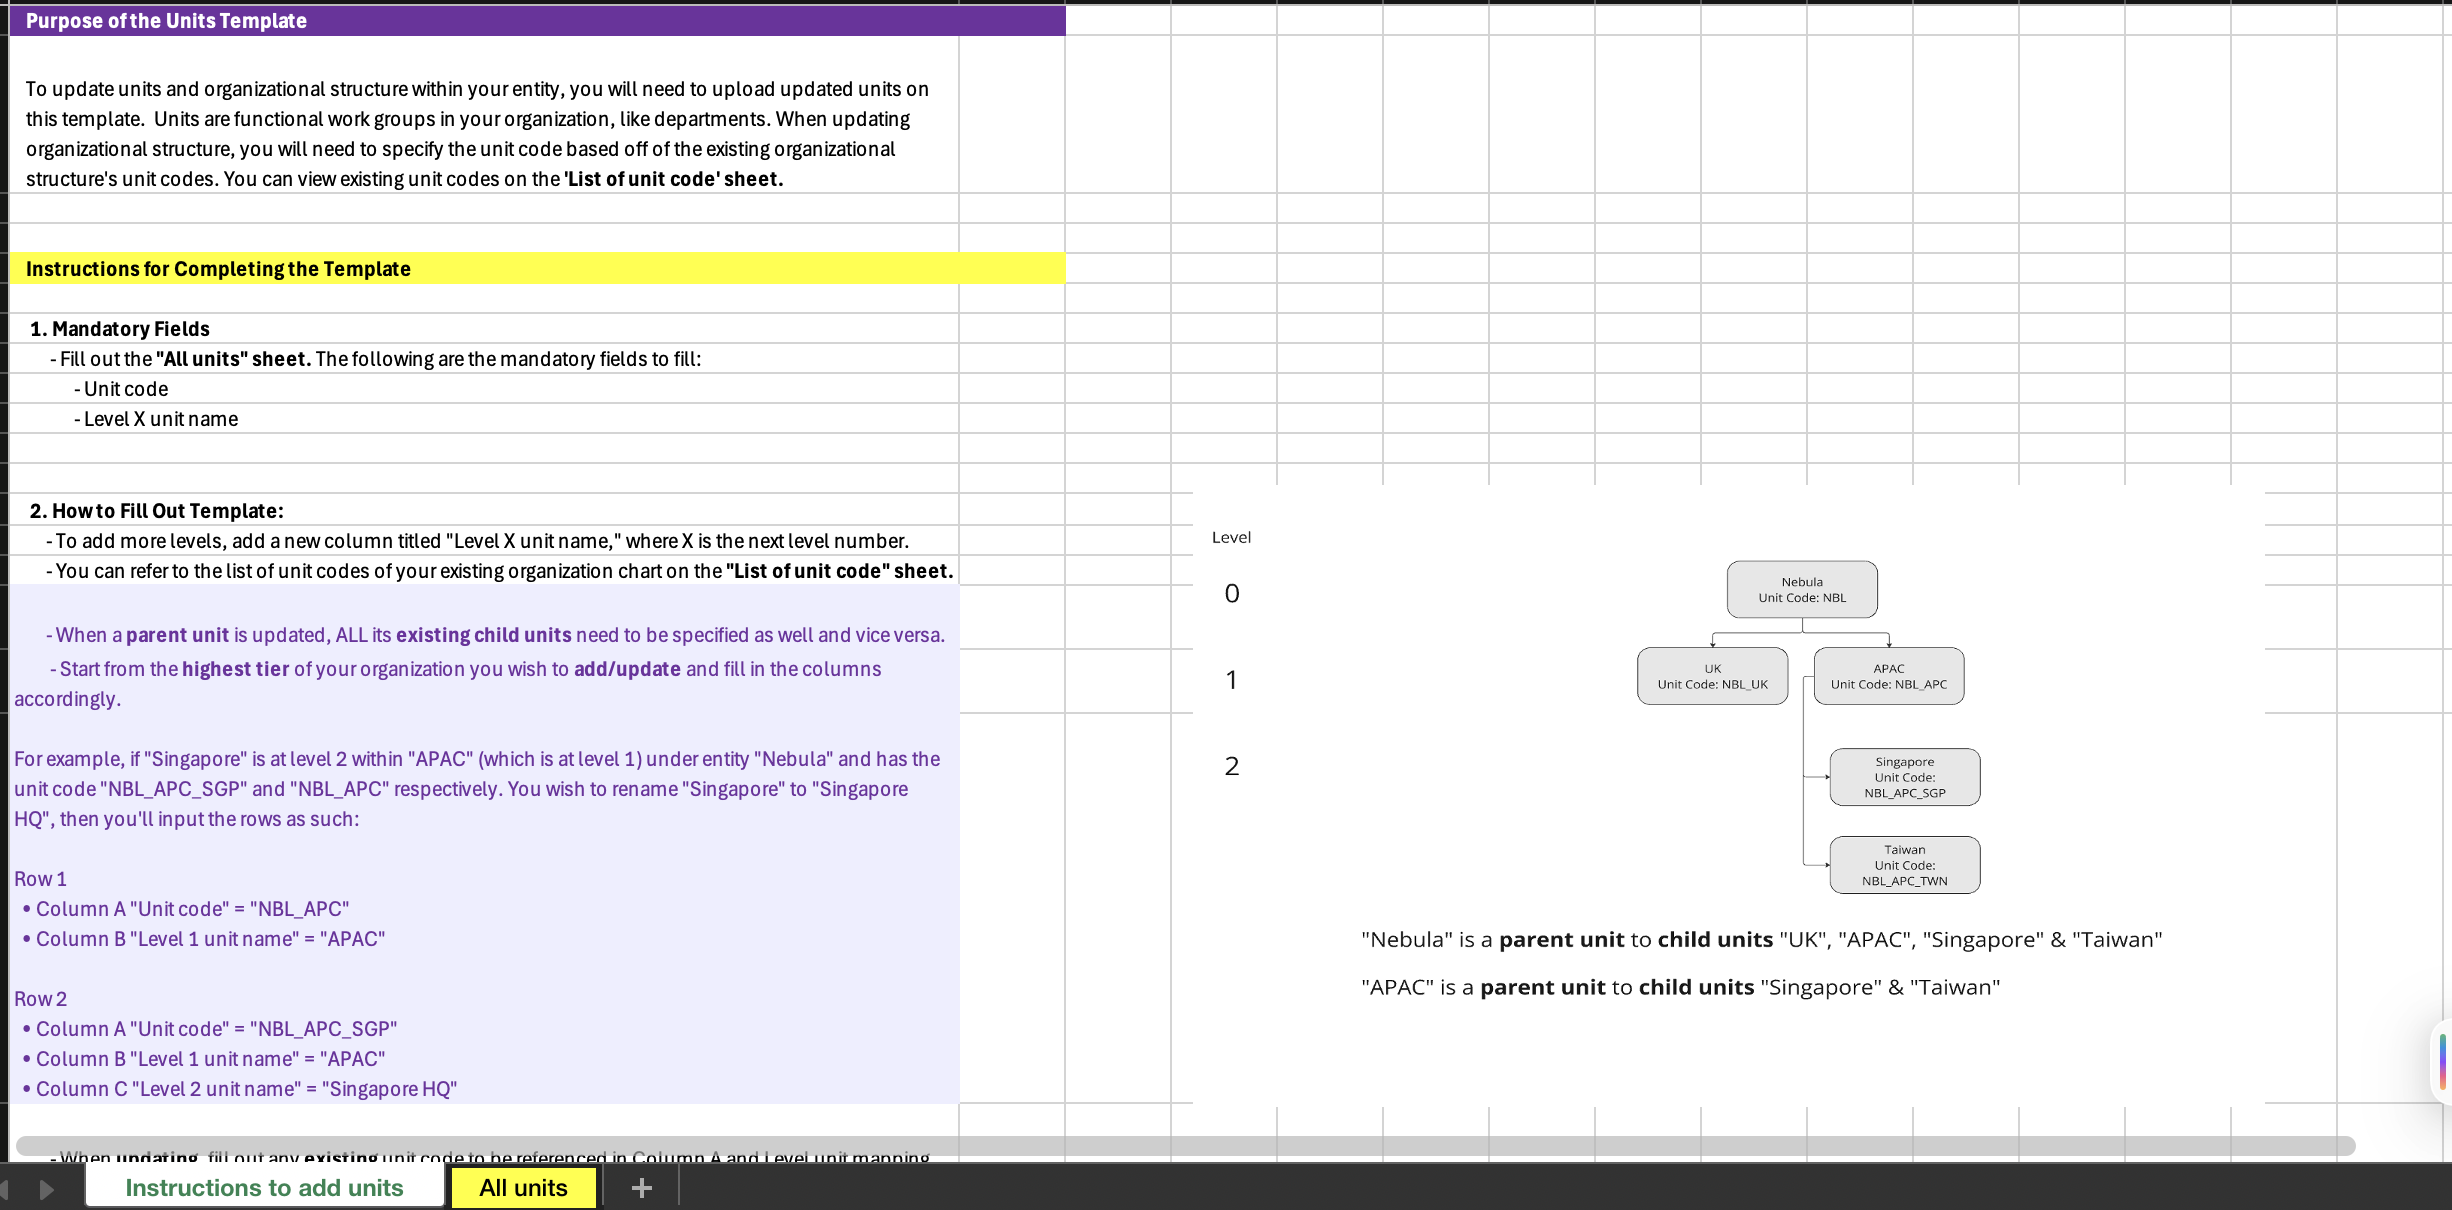
- Fill in the template with your organisation's unit structure. Each row represents one unit. Fill in the full path from your top-level unit (Level 1) down to the deepest level in your structure (e.g. Level 2, Level 3, and so on).
💡 Getting unit names right — this is important: Unit names must be accurate and consistent. Capitalisation, punctuation, and spacing must match exactly what you will use in your Employee List and all future data imports. Mismatched unit names are one of the most common causes of upload errors.
- Save the completed file in .xlsx format.
- Upload the file by dragging and dropping it onto the import page, or click to browse and select it manually.
- Review the uploaded structure carefully. Check that the unit hierarchy — Level 1, Level 2, Level 3, and so on — is structured correctly before confirming.
- Click 'Confirm Units' if everything looks correct. If the file has errors, click 'Discard Changes and Import a New File' to fix and re-upload.
- Once uploaded, check the Organisational Chart view to confirm all units appear as intended.
What to Expect After Uploading
After a successful upload, your organisational chart will be visible in the Organisational Chart view, showing all units in their correct hierarchy. Each unit will be automatically assigned a unique Unit Code by the system, you will need these codes when editing the chart later or when uploading Unit Heads in bulk.
You can now proceed to upload your Employee List and assign Unit Heads to each unit.
Something Not Working?
My upload fails with a unit structure error.
- Likely cause: Level columns are incorrectly filled in, parent unit names don't match child unit references, or there are blank rows in the middle of the data.
- Action: Check that all Level columns are filled in completely, parent and child unit names match exactly (including capitalisation and spacing), and remove any blank rows before re-uploading.
Some units are missing from the chart after upload.
- Likely cause: Those rows contained validation errors and were skipped during import.
- Action: Check the error report generated after upload, correct the affected rows, and re-upload the file.
I need to add or change units after the initial upload.
- Action: See the guide on How to Edit an Existing Organisational Chart for instructions on making changes after the initial setup.
Still Need Help?
If you are unable to upload your organisational chart after following these steps, reach out to us at support@engagerocket.co and we'll be happy to assist!