
⚠️ Who is this article for? This guide is for Entity Admins and users with a custom role that grants survey management access. If you cannot see the Recipients tab in your Milestone survey project, you may not have the necessary permissions — contact your Entity Admin for help.
Milestone surveys work differently from Pulse and One-off surveys. Instead of selecting a fixed recipient list, the platform automatically sends surveys to employees based on a key date — such as their start date. Understanding how recipients are set up here will help you make sure the right employees receive surveys at the right time.
💡 How milestone surveys are triggered: The system sends surveys automatically based on dates recorded in the Employee List. For example, a 30-day milestone survey is sent to each employee 30 days after their recorded start date. Each employee must have a Start Date in the Employee List for this to work.
Setting Up Milestone Recipients for the First Time
Navigate to your Milestone survey project and open the survey you want to configure — you will land on the Milestone Recipient Schedule page. At the top, set the time you want survey invitations to be sent by entering a time in HH:MM AM format, then click Save Changes. If you prefer not to set a fixed time, tick Leave send time unscheduled instead.
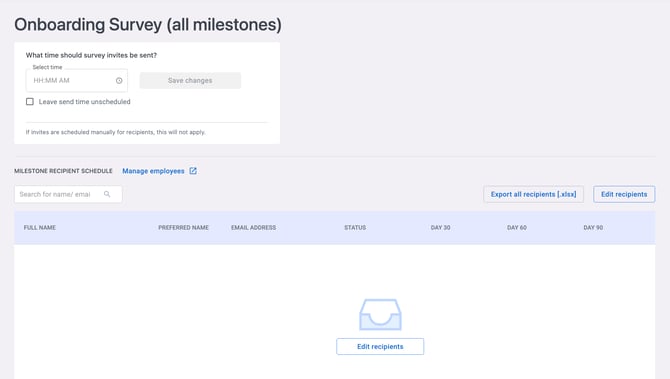
Once the send time is saved, click Edit recipients. You will be taken into the recipient setup for your first milestone (e.g. Day 30). On the left panel, browse or search for employees from your Employee List and tick the checkbox next to each name you want to include. Selected employees will appear in the Milestone Recipients panel on the right. Click Add to recipient list to confirm, then save.
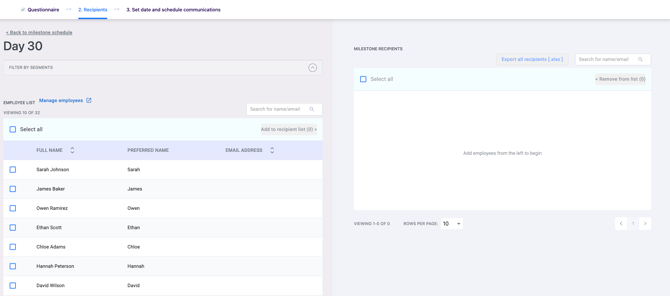
After saving, the platform will show a confirmation page for that milestone. Click Setup next milestone to move on to the next one (e.g. Day 60). Repeat this process for each milestone. At any point, you can click Back to milestone schedule at the top of the page to return to the Milestone Recipient Schedule overview.
💡 Good to know: As long as an employee has a Start Date in the Employee List, the platform will automatically send the milestone survey on the configured dates — you do not need to manually trigger each send. You can also click Manage employees on this page to go directly to your Employee List.
See how to upload and edit your Employee List.
Adding New Employees to a Milestone Survey
First, add the new employee to the main Employee List via the Employees section. Then navigate to your Milestone survey project page and click Edit Recipients. Select the milestone you want to update (e.g. Day 30), add the new employee from the left panel, and click Add to recipient list. Save your changes — the platform will automatically schedule their survey based on their recorded Start Date. Repeat for any other milestones they should receive.
See how to upload and edit your Employee List.
Exporting the Milestone Recipient List
To export your recipient list, go to the Milestone Recipient Schedule page and click Export all recipients [.xlsx] in the top right. You can also export from within a specific milestone's Edit Recipients page using the same button.

Something Not Working?
My milestone surveys are not being sent automatically.
- Likely cause: One or more employees are missing a Start Date in the Employee List.
- Action: Check that each affected employee has a Start Date recorded in the Employee List. Without a Start Date, the system cannot calculate when to send the survey.
An employee's start date has already passed the milestone but they have not received the survey.
- Likely cause: The employee may have been added after their milestone date had already passed.
- Action: Navigate to the Recipients page, find the employee's entry, and manually update their milestone date directly.
I need to remove an employee from a milestone survey.
- Likely cause: The employee is no longer relevant for this milestone.
- Action: Click Edit Recipients, go to the relevant milestone, find the employee in the Milestone Recipients panel on the right, and click Remove from list.
Still Need Help?
If you have questions about managing milestone survey recipients, reach out to us at support@engagerocket.co and we'll be happy to assist!