
⚠️ Who is this article for? This guide is for Entity Admins who need to manage who has access to their EngageRocket account. These actions are all performed from the Entity Users tab under Entity Permissions. For an overview of how all permission tabs work together, see the Overview of the Permissions Section.
The Entity Users tab is your central directory for controlling who has access to your EngageRocket account. This article covers everything from sending your first invitation to managing existing users, including reassigning roles and removing access when needed.
Option A: Inviting Users Individually
- Navigate to Entity Permissions from the top navigation bar and click on the 'Entity Users' tab.
- Click the 'Invite Users' button.
- In the pop-up window, enter the email address of the person you want to invite. You can add multiple email addresses at once.
- Assign at least one role to each user before sending. The system will not allow you to send an invite without a role assigned.
- Click 'Send Invite'. Each user will receive an email with a link to join the platform. The link is valid for 7 days.
💡 Good to know: The system automatically checks for invalid or duplicate email addresses and will prevent the invite from being sent if any are detected.
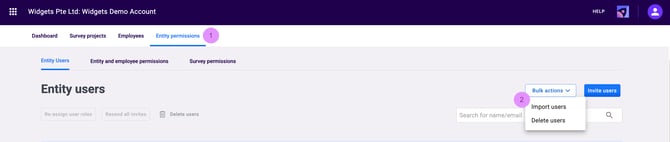
Option B: Inviting Users in Bulk
Use this method when you need to invite a large number of users at once.
- Navigate to Entity Permissions > Bulk Actions > Import Users.
- Click 'Download Template' to get the import file.
- Fill in the template following these rules:
- Email (Column A) and User Role 1 (Column B) are mandatory for every row.
- A user can have more than one role — list each additional role in a separate column (User Role 2, User Role 3, and so on).
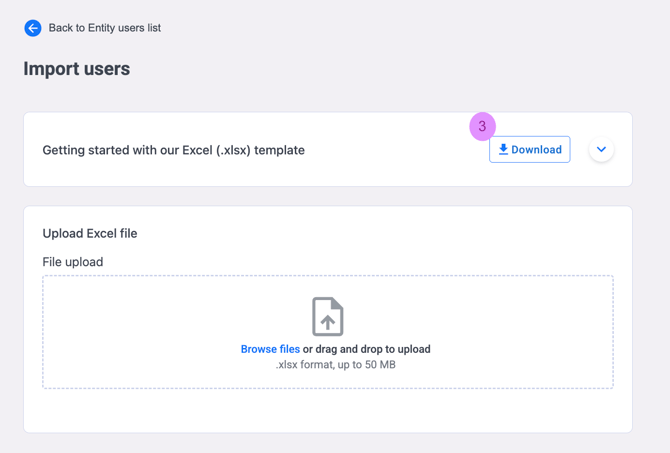
- Save the file in .xlsx format and upload it. Users will receive email invitations automatically.
💡 Roles update on re-import: If a user already exists in the platform and you include them in a bulk import, their roles will be updated based on the file. Review carefully before uploading to avoid unintended changes.
Understanding User Status
In the Entity Users tab, every user has a status that tells you where they are in the invitation process:
| Status | What It Means |
|---|---|
| Active | The user has accepted their invitation and created a password. They can log in. |
| Pending | An invitation has been sent but the user has not yet accepted it. |
| Expired | The invitation was sent but not accepted within the 7-day validity period. |
💡 Expired invitations: You can resend an invitation to anyone with an Expired status. Find the user in the Entity Users tab and click 'Resend Invitation' to give them a fresh 7-day window.
Reassigning User Roles
- From the Entity Users tab, find the user whose roles you want to update.
- Select the checkbox next to their name.
- Click 'Re-assign user roles'.
- Select or deselect the roles you want to assign or remove.
- Click 'Re-assign User Role'. The change takes effect immediately.
💡 Need to create or customise a role first? See how to create and manage custom user roles.
Removing a User
To remove a user and revoke all their access, find them in the Entity Users tab and click 'Delete users'. You will be asked to type DELETE to confirm. Once confirmed, the user will immediately lose all access to your organisation's account.
⚠️ Please note: Deleting a user cannot be undone. If the person needs access again in the future, they will need to be re-invited as a new user. Their previous activity history in the platform will not be recovered.
Something Not Working?
The system won't let me send an invite.
- Likely cause: No role has been assigned to the user before sending.
- Action: Add at least one role in the invite pop-up before clicking Send.
A user's invitation has expired.
- Likely cause: The user did not accept the invitation within the 7-day validity window.
- Action: Find them in the Entity Users tab (status: Expired) and click 'Resend Invitation' to give them a fresh 7-day window.
I accidentally deleted a user.
- Likely cause: Deletion was confirmed unintentionally.
- Action: Deleted users cannot be restored. Re-invite them as a new user — note that their previous activity history in the platform will not be recovered.
A user says they are not receiving invitation emails.
- Likely cause: The email may have been filtered to spam, or the wrong email address was entered.
- Action: Ask them to check their spam or junk folder. If the issue persists, verify the email address is correct and resend the invitation.
Still Need Help?
If you are having trouble inviting or managing users, reach out to us at support@engagerocket.co and we'll be happy to assist!