Maybe it is a special type of reporting (for instance, a report for a matrix manager) or maybe you want to generate a roll-up report. Whatever the reason it may be, you can create a custom report under the Custom reports tab in EngageRocket.
This feature allows you to create a report with your defined group of employees for the report owners of your choice.
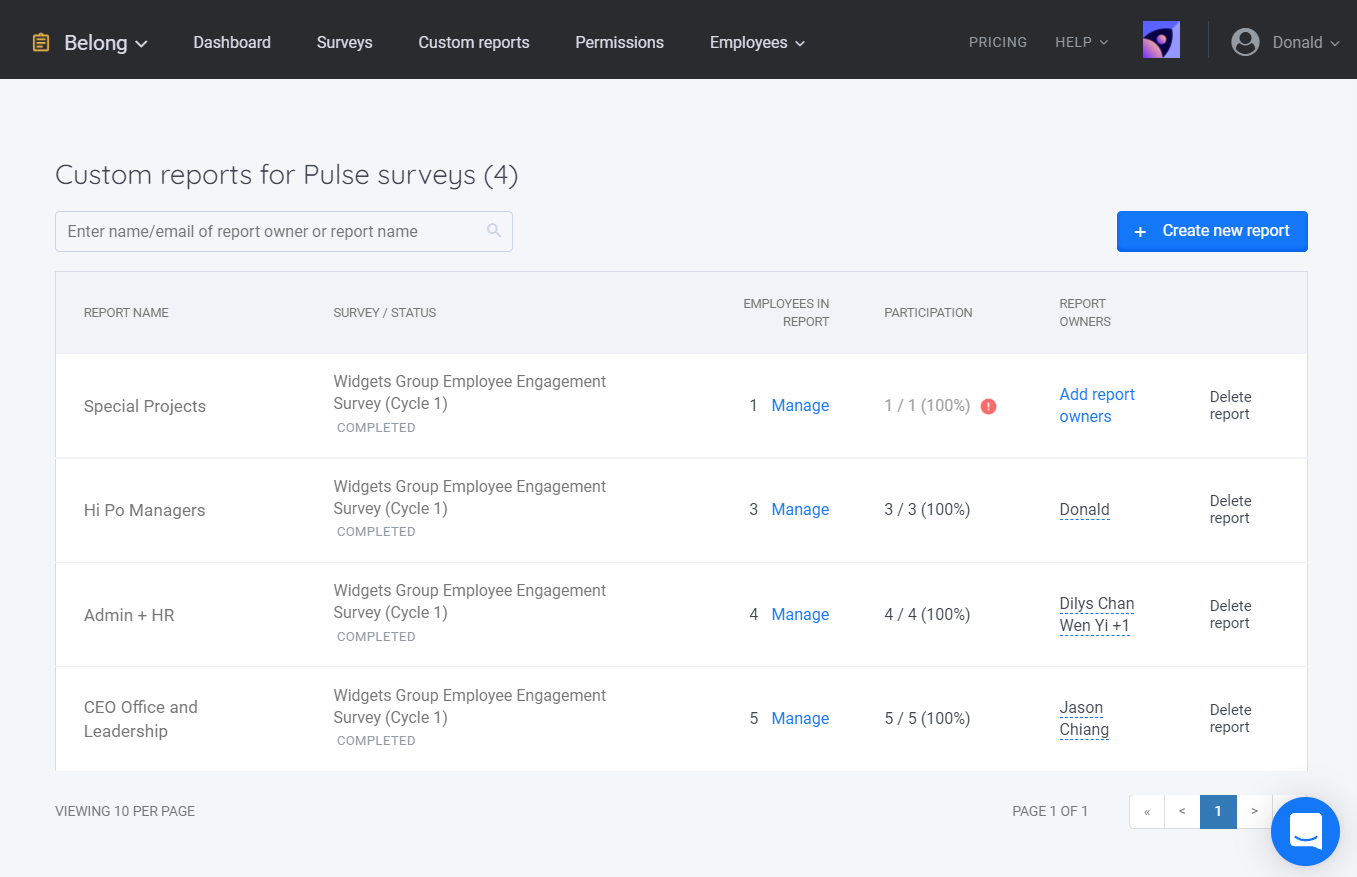
Did you know? If the confidentiality threshold is not met, there will be a red exclamation mark (!) beside the participation rate of the custom report!
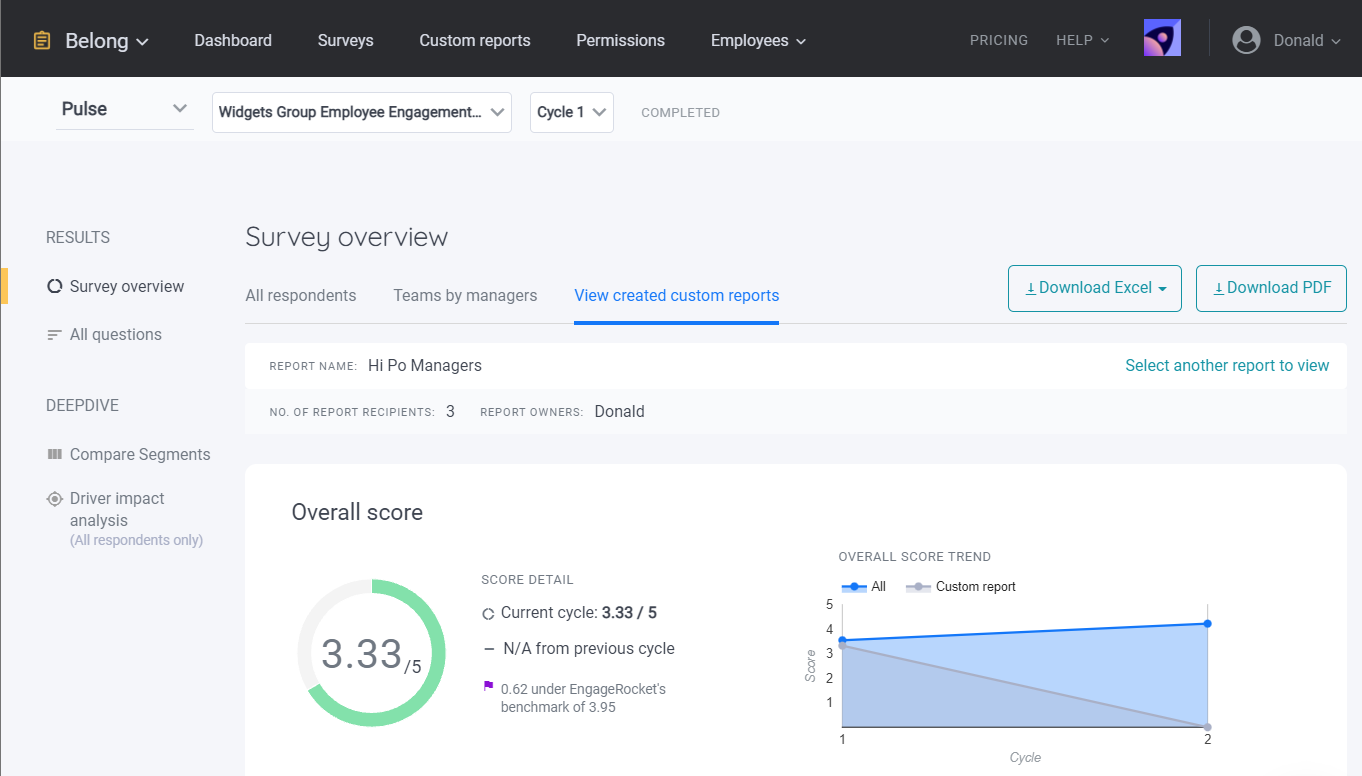
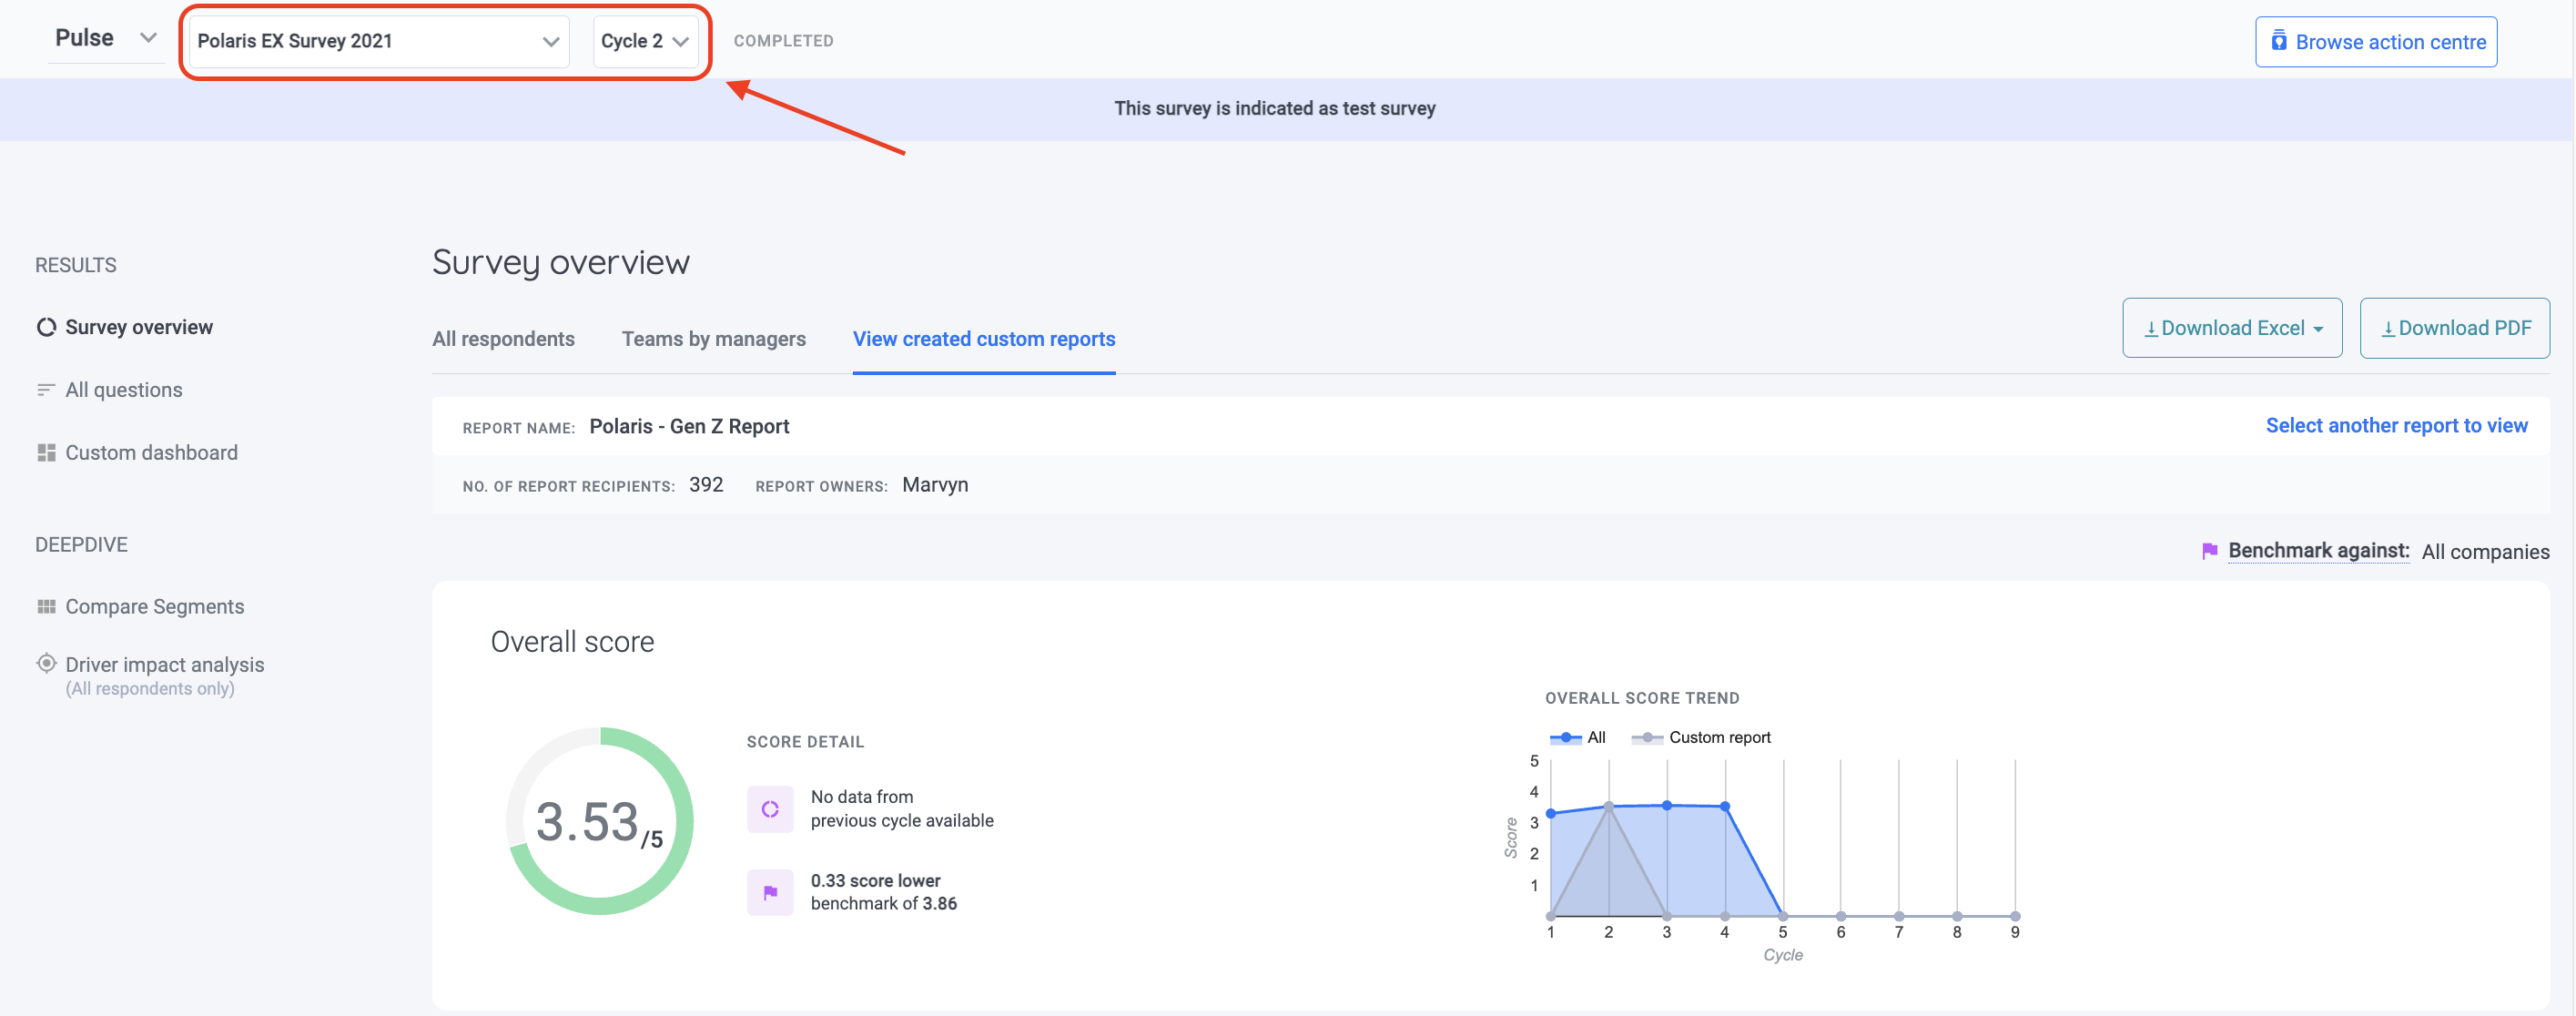
Report owners can view custom reports created on the Survey overview page under View created custom reports.
Do note that a report owner has to be either a company admin or manager in order to be able to view the custom report.
Let's see how we can easily create a custom report!
Pro tip: You can trend Custom reports too! You will just need to make sure the previous cycle has a report of the same name (case sensitive).
Step 1. Creating the report and selecting the cycle
Navigate to the (1) 'Custom reports' tab and click (2) 'Create new report' button, give it a meaningful name, and select the survey cycle for which you are creating the custom report.

Please note that the Custom Report name must be unique and cannot duplicate any existing report names. When you are done, click Create report, and you will see the newly created custom report appear in the list.

Step 2. Selecting the participants and report viewers
Now you only need to add employees and report owners for the custom reports.
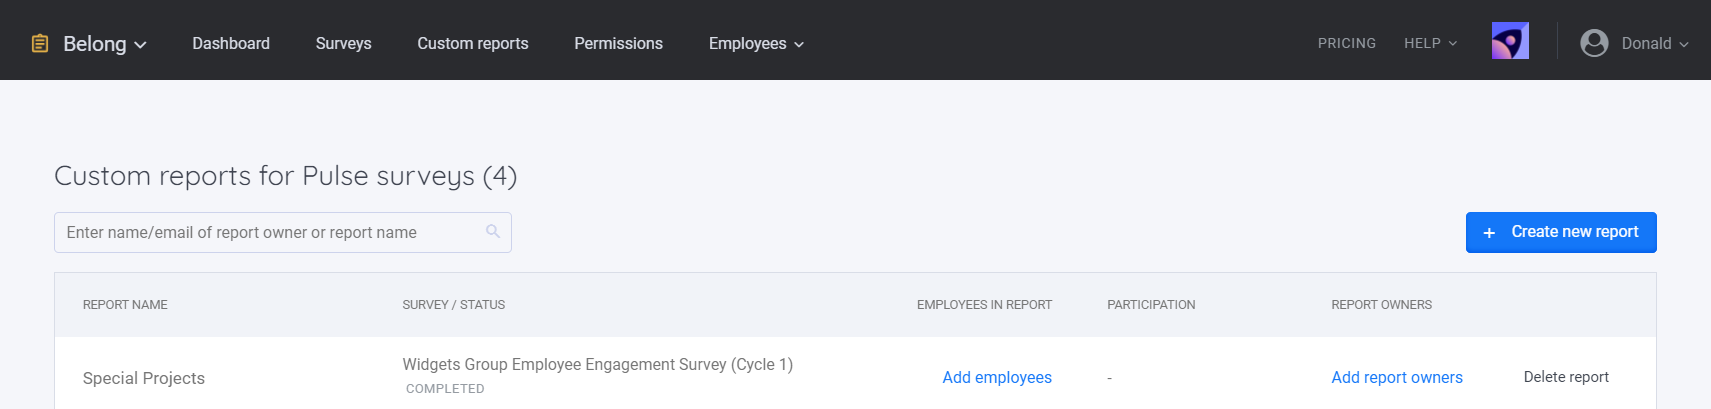
To add employees, click on Add employees, in the page that comes up, you can filter and insert the employees into the list. Once you have done that, click on Close Page and you will see the participation status.

All that’s left is to click “Add Report Owners” and add them to the list.
If you’ve already added a Report Owner and would like to add more, simply go back to the Custom Report page, search for the specific report, and under the Report Owner column (as shown in the screenshot below), click to add additional owners from there.
Similarly, click on Close Page after you are done!

The custom report has been successfully created!
How to download Custom Reports?
Step 1: Choose the Selected Survey Name
On your dashboard, you'll likely have a list of surveys or projects you've been working on. Identify the survey or project for which you want to download a custom report and click on its name. This will take you to the survey's dedicated page.
Step 2: Access the "View Created Custom Reports" Tab
After selecting the survey, navigate to the "View Created Custom Reports" tab. This tab is where you can manage and access all the custom reports associated with your selected survey.
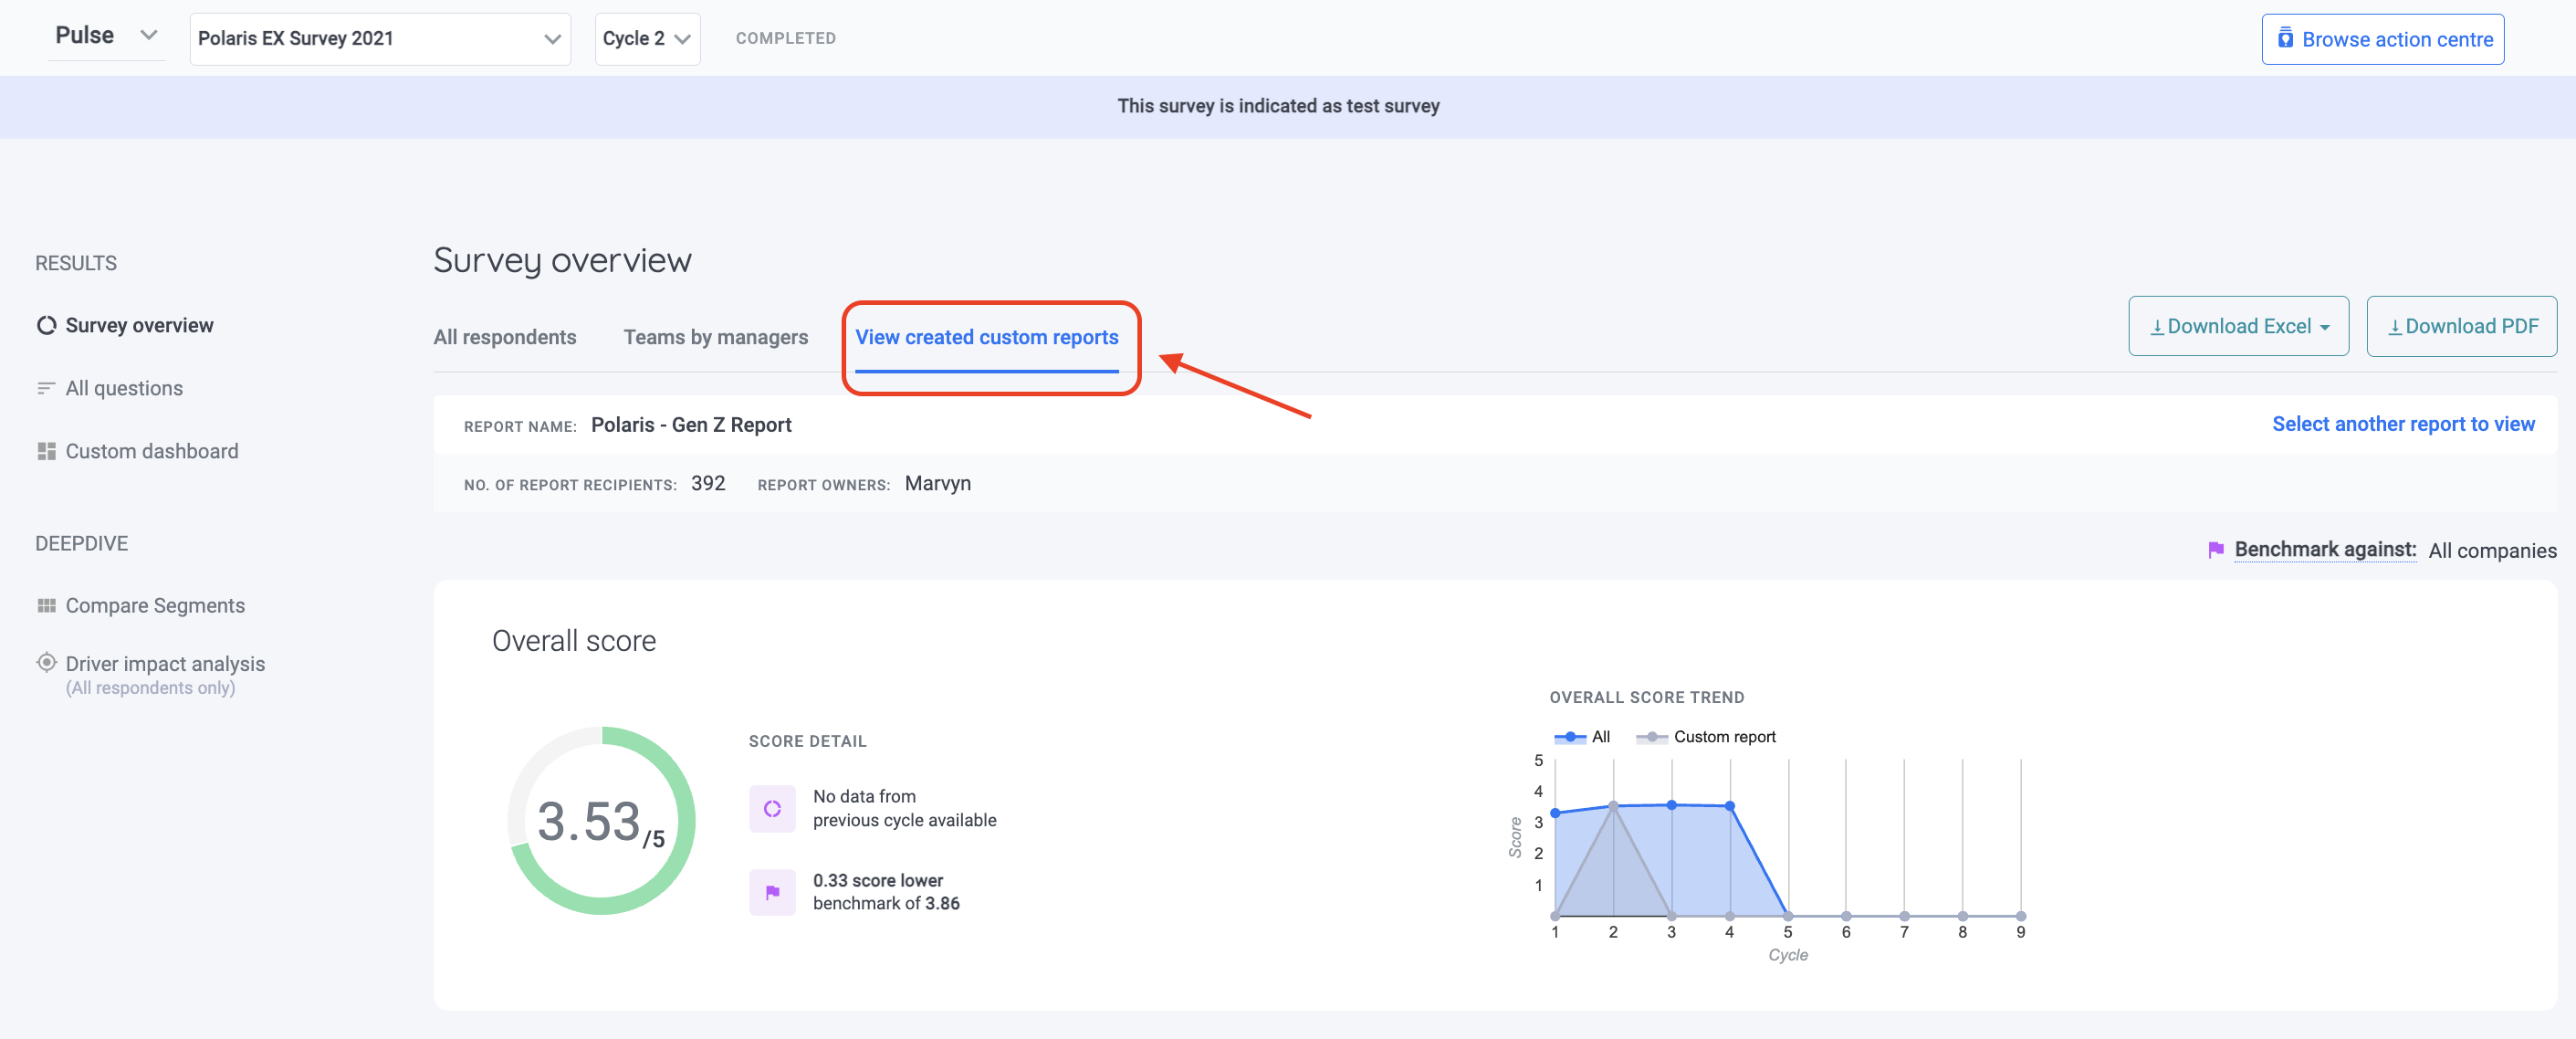
Step 3: Locate Your Custom Report
In the "View Created Custom Reports" tab, you will see a list of custom reports that have been generated for your survey. Locate the custom report you want to download, and you'll find the report's name listed here.
Step 4: Choose the File Format
Now, it's time to decide in which file format you'd like to download your custom report. Most platforms offer options such as Excel or PDF. Consider your specific needs and preferences, and select the format that suits you best.
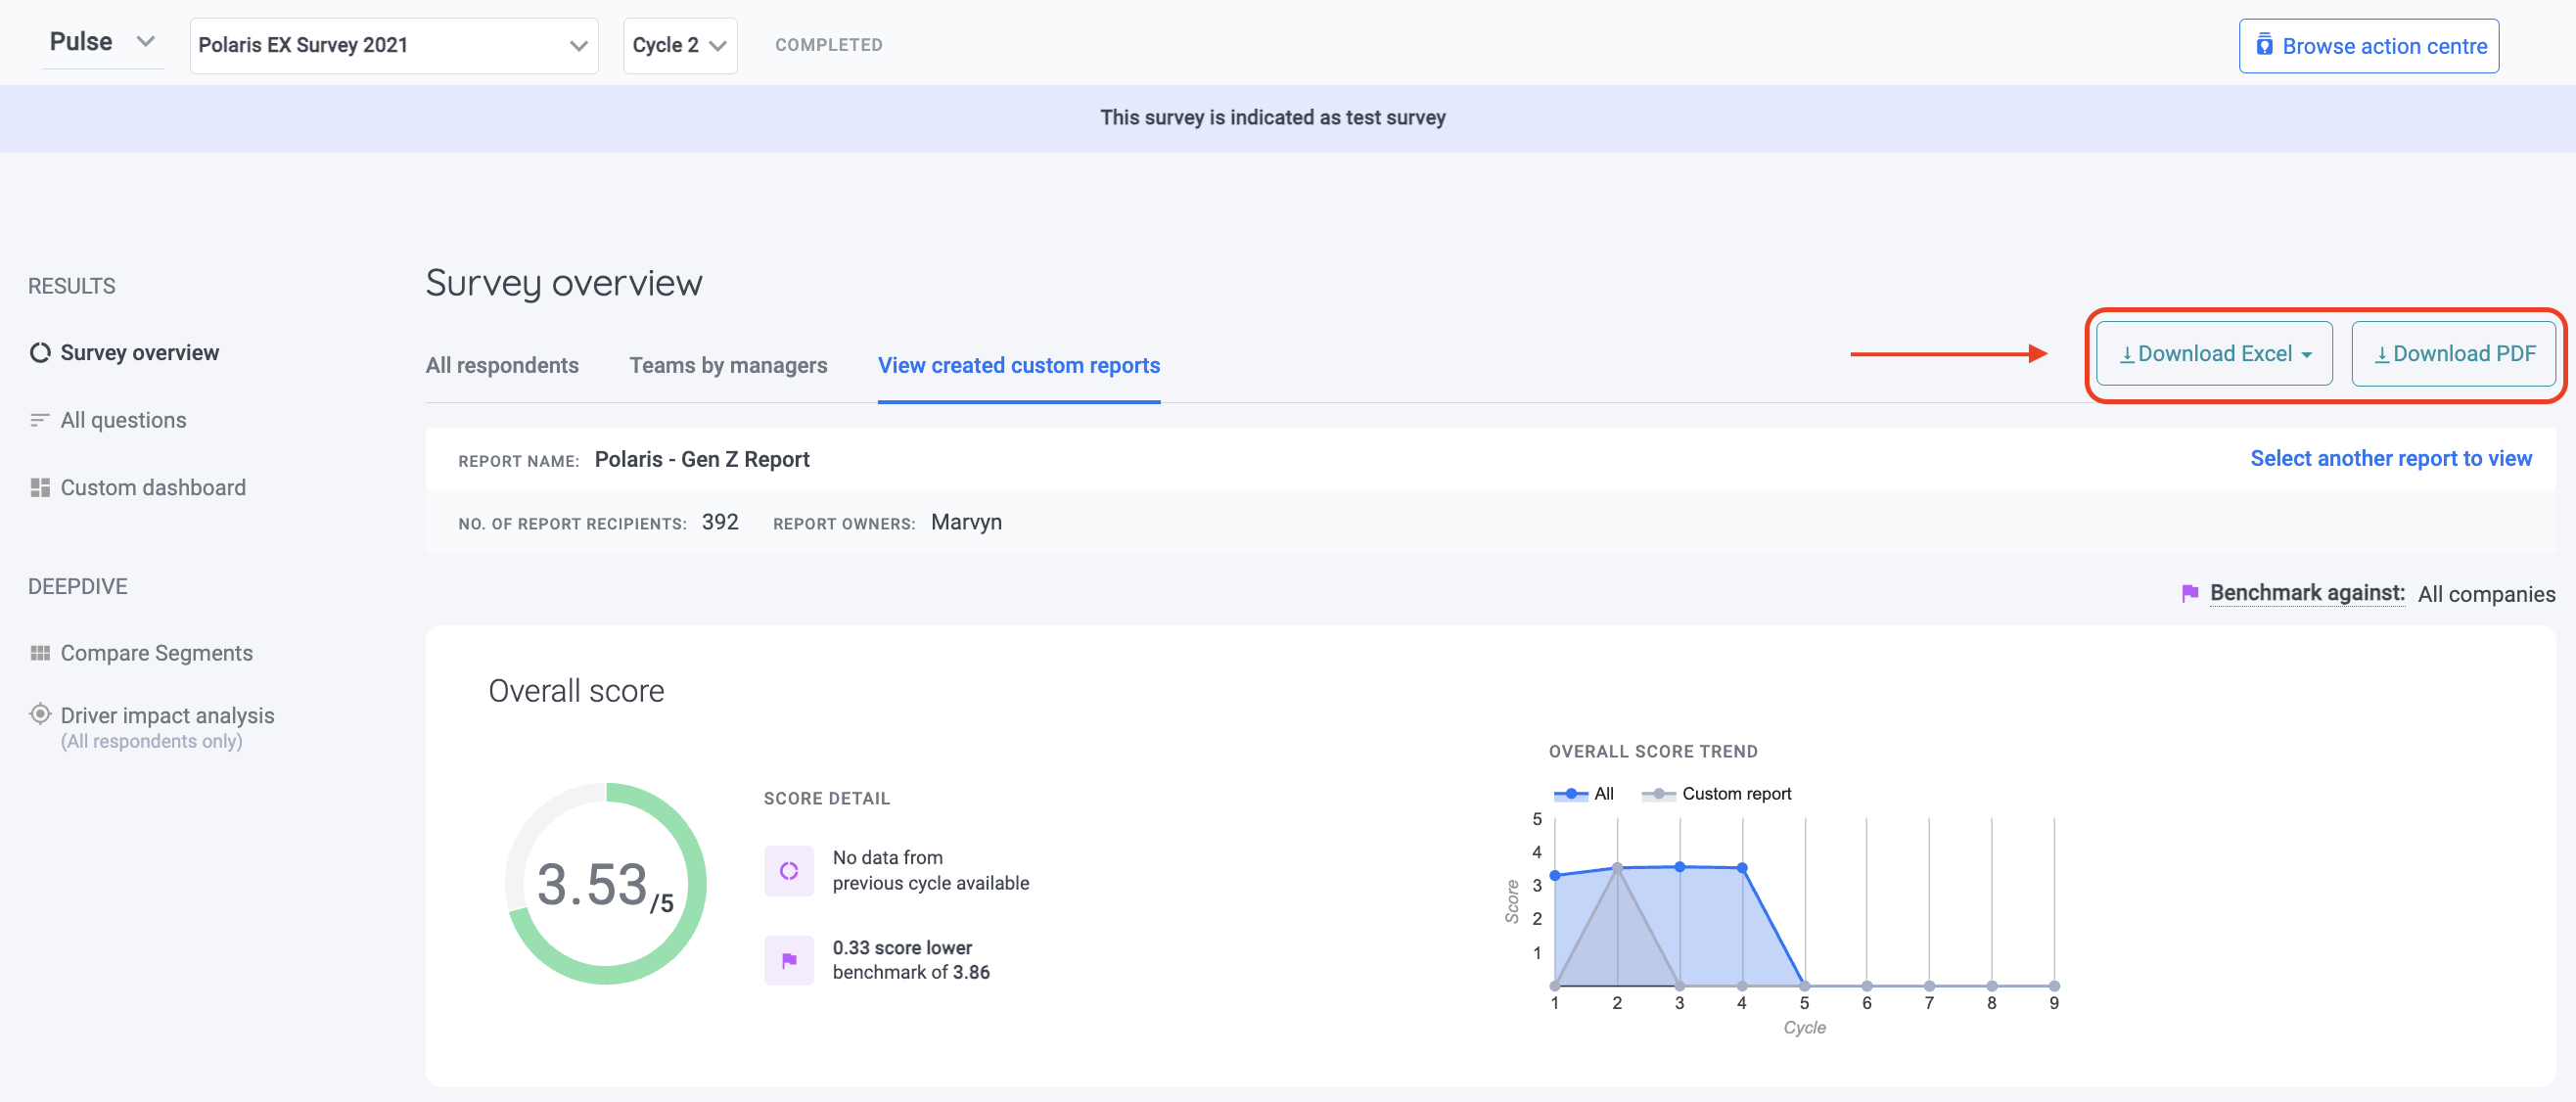
Step 5: Done!
Once your custom report has finished downloading, you're all set! You can now access, analyze, and share your data as needed. If you have multiple custom reports to download, simply repeat the process for each one.
For any questions, contact your dedicated Customer Success Manager or email our responsive support team at support@engagerocket.co We're here to help you every step of the way!